10 Procrastination Busting Strategies

Procrastination…why does it matter and what does it have to do with organizing? Well, clutter is often a component in unorganized spaces. And, clutter can be referred to as delayed decisions. Delay in deciding where it belongs or in putting it away. This can cause anxiety, frustration, and can impede the achievement of our goals because we’re always in catch up mode. It’s the antithesis of productivity.

No use carrying over today’s challenges into tomorrow. Tomorrow will bring its own set of challenges. Let’s dive into some strategies that can help bust procrastination.

1.Remove distractions.

We often pride ourselves on our ability to multi-task. Sometimes it truly is the best way to get a lot done. But, if we’re always in juggling mode, it can actually become an obstacle to tackling that thing – that bigger thing that you don’t want to do, but need to. You may need a longer stretch of focused time, and distractions like phones aren’t helping. Consider only responding to emails during certain blocks of time throughout the day, instead of immediately. It will free up time for other things.

2. Identify why you’re procrastinating.

Ask yourself why you’re not wanting to do the thing you’re procrastinating about. Depending on the reason, your strategy will vary. If you truly dislike doing the task, ask yourself if it’s something you can delegate. Or, if it even has to get done at all. If you’re procrastinating because “that thing” feels just too big, too overwhelming to even start, this next strategy can help.

3. Break it down.

If the looming thing feels too daunting, you’re probably thinking of it in its entirety. Break it down into smaller pieces. Maybe you can’t free up a whole day, but you can find an hour to just start. Starting can be the hardest part, but it’s so worth it, because it’s all you need to build some momentum.

4. Get moving.

get moving, stop procrastinating

If you start feeling lethargic or falling into a repetitive state of thought dreading that thing, get a change of scenery. Get up and walk around or try to get outside. It is great at getting you unstuck and waking you up. Afterwards, you’ll likely feel you have a different perspective, more energy, and a better state of mind for productivity.

5. Pace yourself.

Just like it’s important to break something down into smaller pieces, it’s also helpful to work in chunks of time, pacing yourself and taking short breaks. Using a timer is a helpful tool here. Start with just 20 minutes.

6. Reward yourself.

“That thing” might really be hard. It’s undesirable, for whatever reason. So, identify a reward for when you finish something. Use positive language – yes, even with yourself. “WHEN I finish this workout,….” not “IF I finish it”. It makes a difference!

7. Timing matters.

creative energy

Do you have the most creative energy first thing in the morning? Then that could be a great time to do something that requires creativity. In general, tackling something we’ve been putting off by doing it right away in the morning will work out well. Or, if you need a distraction free house, tackle it when the kids are sleeping.

8. Let go of doing it perfectly.

Worrying about perfection prevents us from even starting. Identify what good enough looks like for the thing that you’re avoiding. Think of the worst case scenario and it’s probably not that bad. The fact that you’re even thinking about quality and doing something well likely means it will be done to satisfaction, because you’re conscientious. Let that be enough.

9. Make a plan.

writing a plan down to bust procrastination

Making a plan makes that thing start to take shape in a way that feels manageable. When you can see a path forward, the ambiguity that was contributing to avoidance and churn falls away. Break it down into concrete pieces, each with a timeline. Jot them down on sticky notes. It’s ok to make them easy and obvious. If you’re procrastinating building a desk, break it down into steps such as: first, find inspiration photos. Then, set a budget. Next, buy supplies, etc. Slow and steady progress and productivity will further propel you towards completion.

10. Self talk matters.

You may currently identify yourself as a procrastinator. You don’t have to do this forever. Start thinking of yourself as someone who is working on procrastination, and can make (better yet, IS making) baby steps to bust procrastination for good.

Homeschool Setup

Ah, home school, distance learning, whatever the phrase may be – many of us never thought we’d be in the position of homeschooling, but here we are! So, let’s put some thought into what can make this the most successful for everyone.

Most of us are not teachers and don’t have education degrees, but we do know our kids. So, let’s set up an environment that makes the most of what this year will bring. Our kids need less than we might think. A dedicated room is not necessary! After all, the classroom environment is often one room for 20+ kids. We got this! Here are some ideas for homeschool setup that I hope you’ll find practical to implement. Happy schooling!

1. Think in terms of zones.

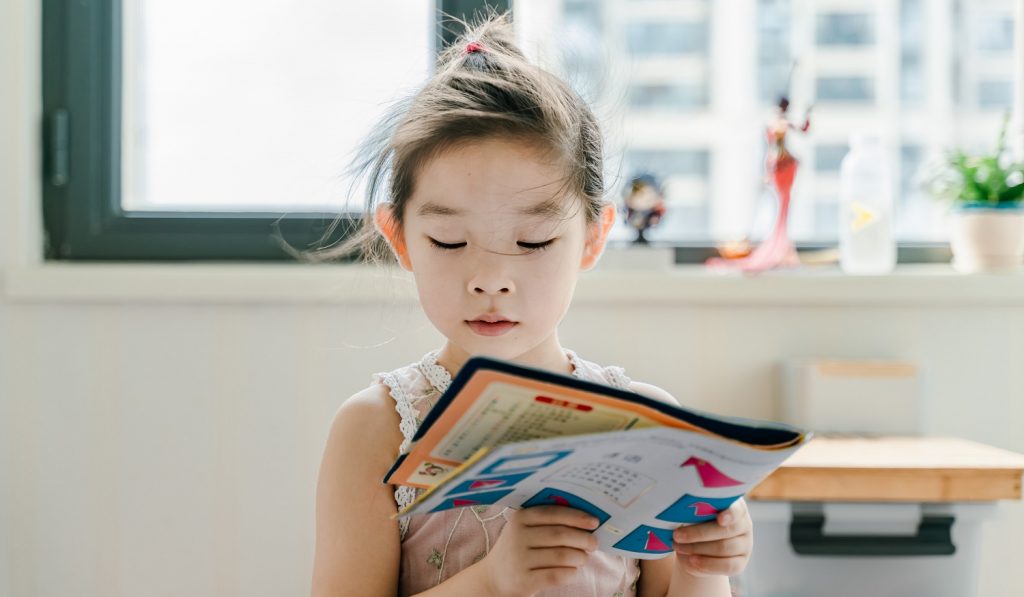
reading zone

If we consider how a classroom is often set up, there are zones. Age dependent, maybe there’s a reading area, dress up corner, a craft zone, workspaces, and a drop zone (for backpacks, etc). I’m not suggesting you carve out space for all of these, but home setup can mimic key pieces of this environment.

Designating a workspace with a writing surface is among the most important of these. Separate the sleeping area from the workspace. I’ve found that a workspace other than my kiddos’ bed helps them to mentally transition to their day and prepare to learn.

A cozy reading nook could be as simple as putting some pillows, a container of books, and some little fairy lights in the corner of their room, but could be seen as a magical fort to your child.

2. Have supplies at hand.

Not only the right supplies, but within reach of your child, contained, labeled, and in a place where they know to find them. Let those back to school supply lists guide you, so you can make sure to have the basics on hand.

Consider lined, plain white, and construction paper, as well as pencils, colored pencils, pens, markers, a calculator, scissors, glue, and some folders.

These caddies are great for having the most often used items at your fingertips, and have the added bonus of portability. Art class in the backyard? Grab the caddy and you’re good to go!

3. Make it fun!

One of the benefits of learning from home is that you can be creative and flexible, taking full advantage of the environment. Learning doesn’t all have to take place with a chair and desk. Mix it up and use a beanbag or flashlights, take a lesson out on your deck or have reading time in a hammock. You know what will work for your child – what will be a fun new adventure vs. what might be distracting. And, if something doesn’t work, that’s ok! Experiment and learn.

4. Maintain the space.

Having a home for all the supplies is one thing. Maintaining the space is another. Just like your kids are responsible for doing their part to maintain order in their classroom, they can be responsible for putting things away at the end of their homeschool day as well.

5. Independence is key!

supplies

This one applies to kids of all ages. Yes, it’s helpful to have supplies within reach for the youngest of students. But, it’s also important to ensure older students understand that you’re there to support them, but just like in school, they’re expected to be independent learners.

Regardless of your homeschool setup, everyone will be just fine. And, we may all learn a thing or two about patience, flexibility and resilience in the process.

Dipping a Toe into Minimalism

Full on minimalism may seem unattainable. Or, frankly, not even that appealing – at least when we think of going “all in”. But, there’s an opportunity to reframe minimalism by thinking in terms of adopting what does seem appealing, achievable, or fiscally and socially responsible.

There is a significant space to occupy that is centered between all and nothing. And it can reflect the aspects that resonate the most with YOU. Below are some ideas of how you might dip a toe into minimalism. Perhaps you already do some of these things. It’s simply a thought starter…not a checklist or a mandate. Here are 7 ways to explore minimalism:

1.Recycle

Creating less waste is certainly a component of minimalism – and one that isn’t difficult once it becomes a habit. Keep it simple by putting a container for recyclables in a convenient location, and encourage your family/kiddos to participate.

2. Have a spending freeze

This is actually a fun challenge. You can be as stringent or lax as makes sense to you. You could go for a week or a month. Or, you could designate a category or two to be excluded from the freeze. Groceries would be a common one. But, remember, this is an opportunity to stretch. So, even for the excluded categories, challenge yourself to cut back. You’ll likely be surprised by how resourceful you can be.

3. Find 5 things to get rid of

I do this periodically, and find that it’s a good practice to guard against the accumulation of excess. Anything counts. Just 5 things that were in your home that no longer will be. Trash, clothing, donations, things to sell. Identify the 5 and then act on them (ie make that drive to your favorite local donation center). On a roll? Go for 10 items! Or, 20! You’ll be surprised at how easy it is.

4. Try a capsule wardrobe

Capsule wardrobes are intriguing, but can be intimidating. They just seem so….extreme. Truth is, I didn’t know what else to title this. “Wear fewer items of clothing” just didn’t, um, sound right. Ha! At any rate, the objective here is to find those favorite versatile pieces (pick a number) that meet your needs. Choose pieces that make you feel like a million bucks and can be layered, mixed and matched and that you’ll get a lot of mileage out of.

minimalism

Wear them for a month or a season. Some people include accessories, shoes, etc. in their item count and others don’t. It’s not about rules or deprivation, but it is about finding that sweet spot, and challenging yourself to wear what you have and be satisfied with it.

5. Identify your priorities

My favorite minimalism guru Joshua Becker defines minimalism, in part, as the “promotion of things we most value”. How do we promote what we most value if we haven’t first identified those things that we most value? We often think of minimalism in terms such as decrease/strip down/lessen/minimize, but can’t forget to address the flip slide. By doing this reducing, in turn, what are we building up? Priorities, values, time, etc. We don’t truly realize the benefits of minimizing until we acknowledge this piece.

Going through the process of identifying priorities helps you find your why for taking these baby steps toward minimalism. If one of your priorities is travel, for example, then spending less in other areas will feel purposeful, You’re working toward a goal of re-allocating your spend in a direction that has meaning to you.

6. Eat more simply

We all appreciate choices, but consider the benefits of having fewer types of food on hand. Fewer choices likely correlates to a lower grocery bill, less overwhelm of what to cook, what to store, and what to consume. You’ll also likely find yourself eating more real/whole foods – as these are the ones that can stretch, are filling, and have the versatility to make different meals.

7. Start a toy rotation

minimize toys

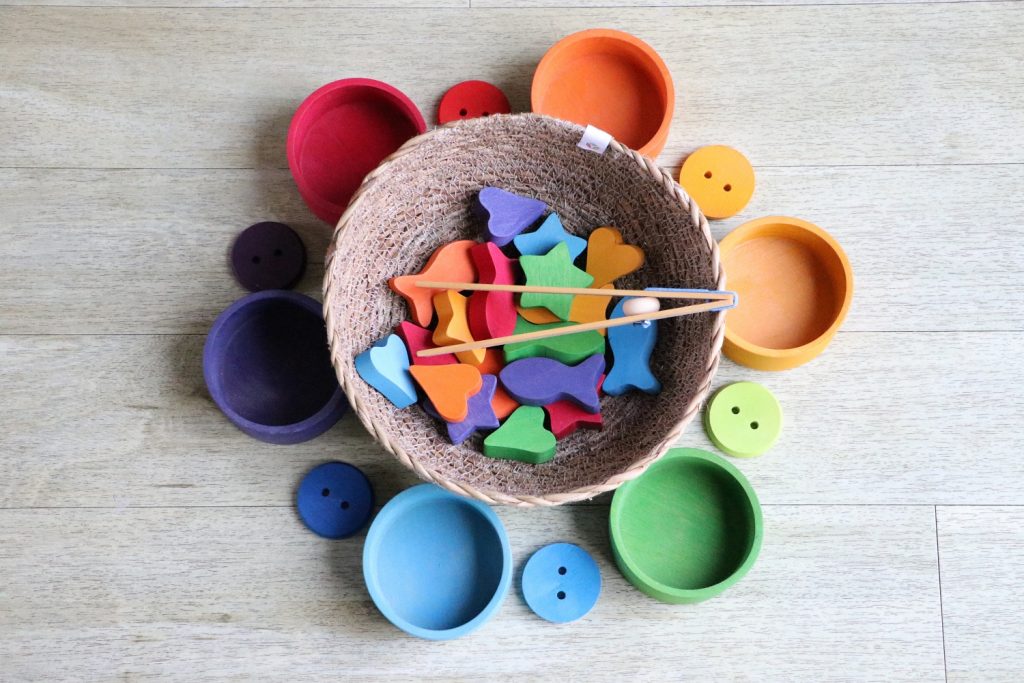
Box up half your toys. Or, whatever fits in 2 or 3 containers. Just give it a try. Put them aside for a month and see what your kids ask for or miss. My guess is that they’ll really notice what remains. They may engage in deeper play for longer periods of time because they’re able to focus on what’s there instead of being overwhelmed by choices. Then, when the month is up, you can either choose what to get rid of, or bring things back into rotation and remove some others for a month. Just with all of these suggestions, there’s a scalability to this that can be adjusted to whatever level you’re ready for – dipping a toe, or maybe even a whole foot!

6 Ways to Organize Small Spaces

*Disclosure: Links included in this post are amazon affiliate links. This means that, at no additional cost to you, I will earn a small commission if you click through and make a purchase.

It may appear that beautifully organized spaces are always spacious….vast walk in pantries, entire rooms dedicated to crafts or toys. And, this can certainly be the case. However, it’s very possible to organize small spaces. The challenge posed just encourages a little more creativity. Here are 6 ways to organize small spaces.

1. Purge

I had to include this first because it’s more important than ever to start with a purge when you have a small space. Once you’ve edited down to only what you use/like/need should you start the organizing process.

2. Think vertical

There are some really great over the door options on the market. Elfa makes some affordable, quality, configurable over the door units to house anything from wrapping paper and office supplies to clothing. Check them out here https://www.containerstore.com/elfa/index.htm.

You can also find pocketed plastic over the door units great for separating out different craft supplies.

3. Use wall space

There are lots of ways to utilize those open bare walls. Hang a shelf to gain additional storage space for anything from dishes to clothing. Or, if you need more floor space, consider installing a Murphy bed that folds up into the wall when not in use.

4. Utilize under the bed storage

Not a fan of clutter under the bed, but I love the idea of utilizing storage bags made specifically to stow under beds. They’re great for housing bulkier seldom used items such as blankets, comforters, or sweaters. Here’s a good option:

5. Find multi purpose solutions

Consider how to get the most bang for your buck with your furniture and organizational items. Think sleeper sofa or a room divider screen with build in shelves.

Things in this category can get gimmicky, though (would I really use a combination can opener/screwdriver/battery charger?) so I recommend first identifying the purposes you’re trying to solve for, THEN look for a solution.

6. Optimize odd shaped spaces

Kitchens and closet designs are notorious for including odd shaped corners and other spaces that are hard to access and organize. These wedge shaped acrylics are made specifically to fit within lazy susans.

This lazy susan is great for pantry/cupboard corners. Keep round items on the round lazy susan to maximize space. Oils, vinegars, and other jars and condiments fit particularly well on these.

And, the below stacking version is helpful for bathroom products. More often than not, if you have an odd shaped area, others do, too. Google your design challenge and you’ll likely find a host of ideas and products to meet your precise needs.

Label ABC’s

*Disclosure: Some links included in this post are amazon affiliate links. This means that, at no additional cost to you, I will earn a small commission if you click through and make a purchase.

This topic is riveting! No, really……stay with me. Labeling can make or break an organizing system, and provide that extra touch that really elevates a space. Let’s dig into the options so you can determine what the best option will be for your next organizing project. But first…

CONTAINERS:

Why start here? Because you need something to label! I like how Dana White, from A Slob Comes Clean, explains the concept. The purpose of containers isn’t to contain everything we have. It’s to provide boundaries for our things. A container defines the space we’re willing and able to allocate to an item or group of items.

Instead of accommodating all the red crayons you have with multiple/large containers, think of a container as the space you have to work with. So, decide how many red crayons you need, fill an appropriate sized container with them, and part with the rest.

This is a subtle mindset shift that promotes different buying habits. Instead of purchasing the jumbo box of 100 red crayons because it’s on sale, you’ll buy the smaller one that accommodates your needs and fits within the space you’re allocating to it. You’re in charge of your space and you get to make the decisions that result in a decluttered environment that meets your needs.

You don’t need to get fancy. Shoeboxes work fine, as do the many sizes of wallet friendly Sterilite containers that are easy to find. The Container Store is my favorite resource, as they have so many versatile products, as well as solutions for any hard to organize area or niche you could conjure up.

LABELS:

There are so many options out there that one (or many!) will certainly meet your needs.

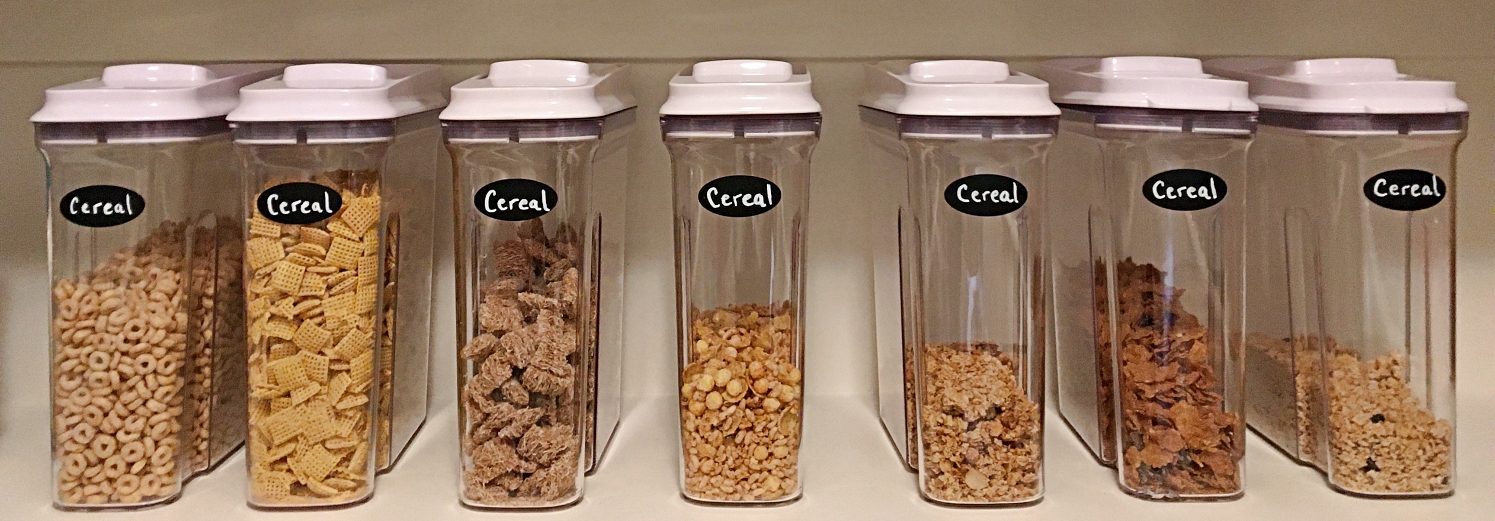
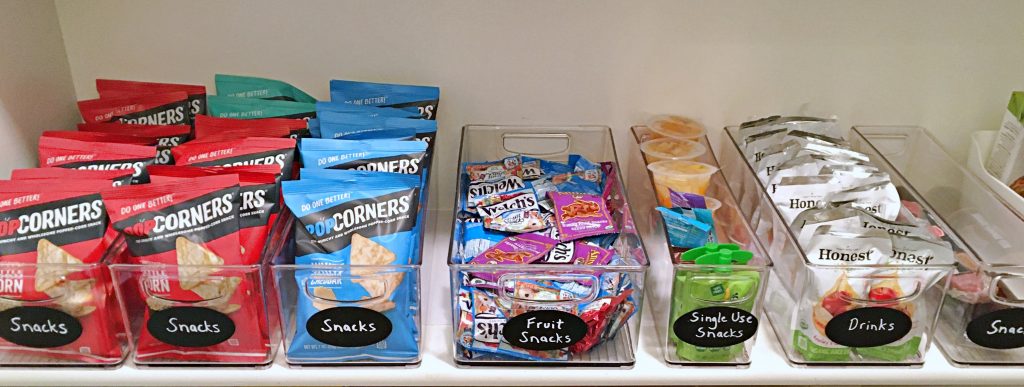
1. Chalkboard Labels:

Pros: Easily change text, relatively inexpensive, adhere well

Cons: Can’t apply to textured surfaces such as baskets/fabric, may smudge

Best For: Pantries, anywhere you’ll need to change text periodically

Purchase here. Chalk pens can be purchased here

acrylics with chalkboard labels

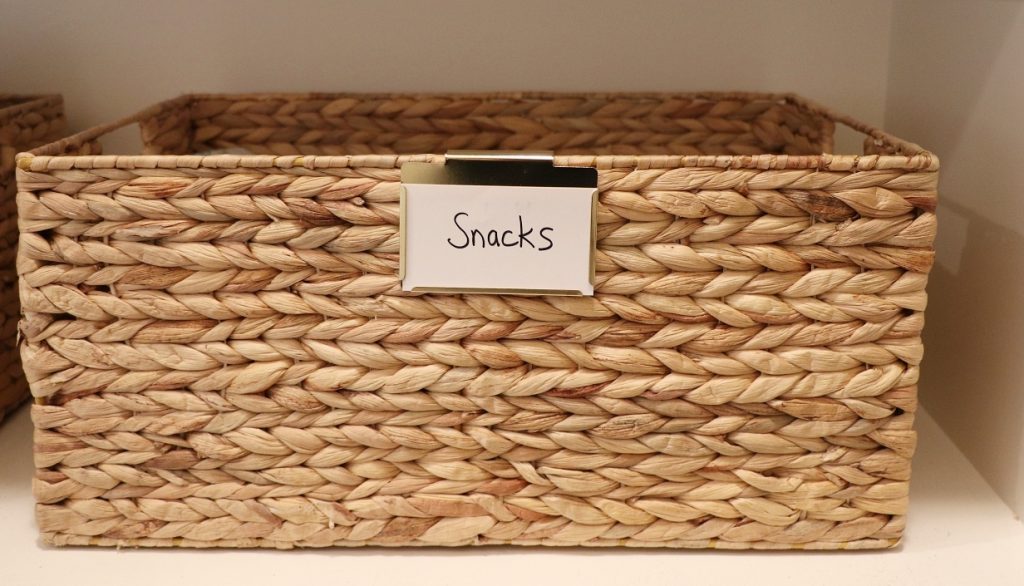
2. Bin Clip Labels:

Pros: Easily change text, versatile, elevated look. Choice of colors – silver (Target), wood, gold, black (Container Store) to work into your decor

Cons: Higher price point

Best For: Baskets, fabric bins

Purchase here (silver labels from Target) or here (Container Store)

bin clip label on basket

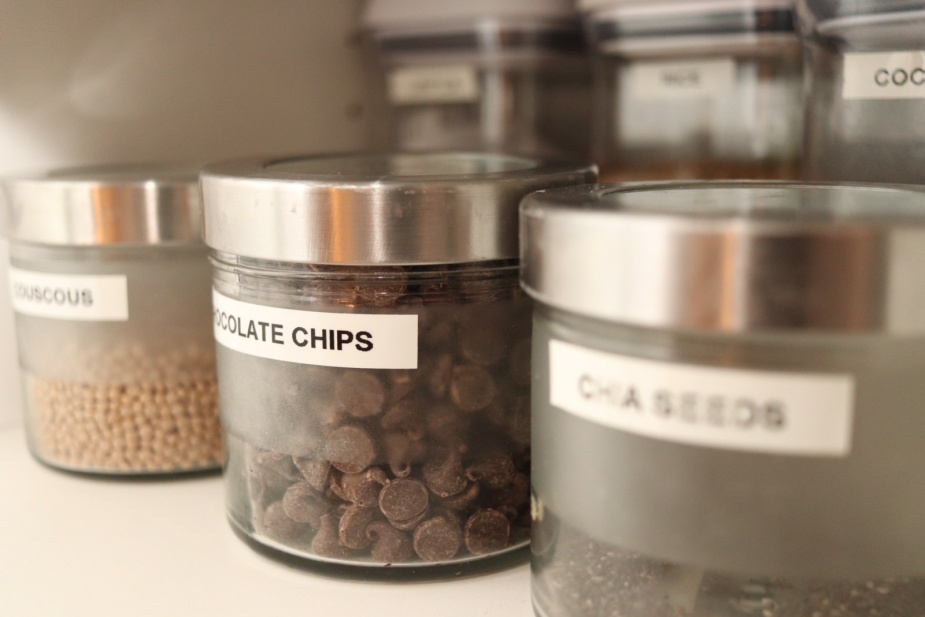
3. Label Maker Labels:

Pros: Inexpensive, easy to generate, consistent typeface

Cons: Learning curve to operate, may lose adhesion

Best For: Smaller containers that can only fit a small label

Purchase here

label

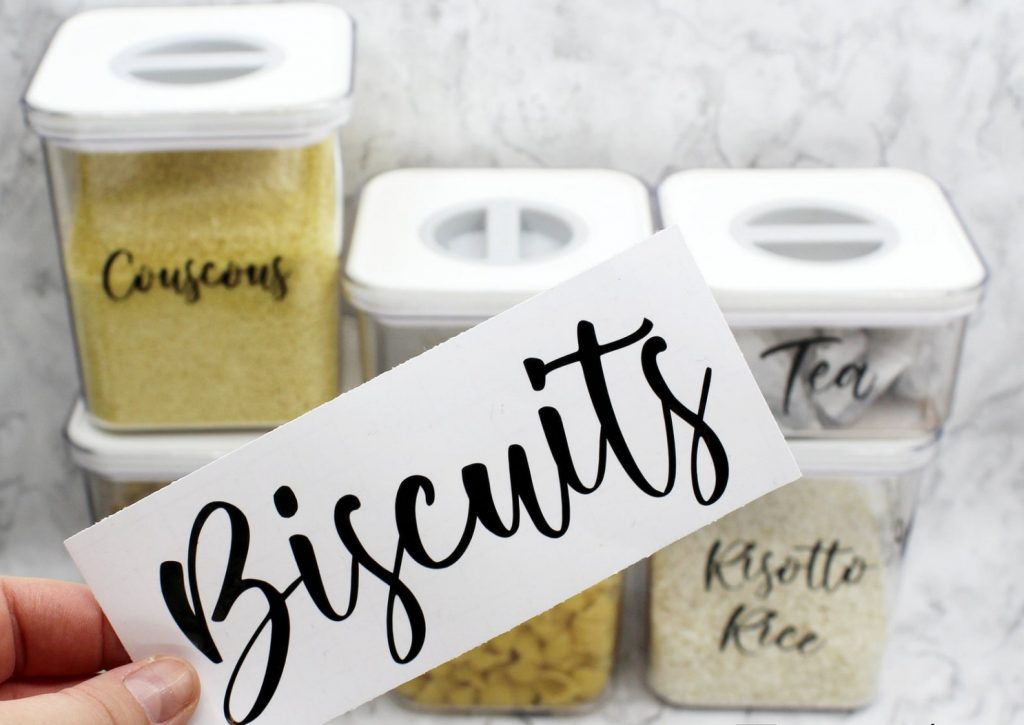
4. Vinyl Labels:

Pros: Beautiful aesthetic

Cons: Pricey, time consuming to generate

Best For: Creating a custom look

Purchase here: For any of you crafters, a Cricut machine can generate the labels. Or, you can purchase them from sellers on Etsy.

vinyl label examples
Mrs. Hinch Stickers, etsy.com

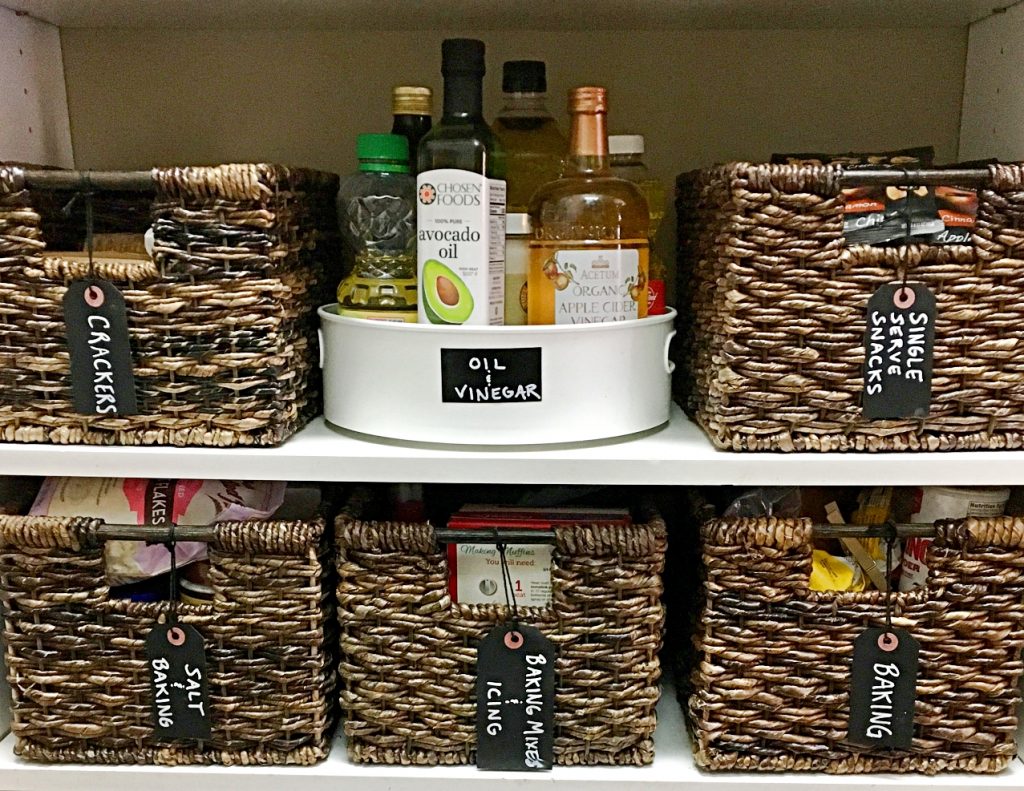
5. Hang Tags:

Pros: Go-to solution when other standard labels won’t work

Cons: Somewhat cumbersome, tend to flip backwards

Best For: Baskets that are too thick to accommodate a bin clip label (like in the photo below)

Purchase here

hang tags on baskets

8 Organizing Pitfalls to Avoid

*Disclosure: Some links included in this post are amazon affiliate links. This means that, at no additional cost to you, I will earn a small commission if you click through and make a purchase.

You’ve given organizing a valiant effort, with varying degrees of success. Sometimes it sticks and sometimes it doesn’t. Organizing is a practice (recurring), not a project (1 time event with a defined start and end). But, even so, you shouldn’t need to reinvent the wheel constantly. You should expect to make headway and feel like you’re on the right track. There are some common organizing pitfalls to avoid – things that make it more challenging for organization and systems to stick. Being aware of them can help you avoid them altogether! Here they are:

1. The decluttering step is skipped

Not all spaces require decluttering. But, most do. More often than not, we attempt to organize a space that has too much in it. Rearranging clutter will still leave you with clutter! We need to see what we have and be able to easily access it. This is much easier to do when you’ve pared down. Ask yourself a few key questions: 1. Would I buy this item again? 2. Do I use this? 3. Do I have something else similar to it? The answers to these questions should help you determine what stays and what goes.

2. Item categories are too specific

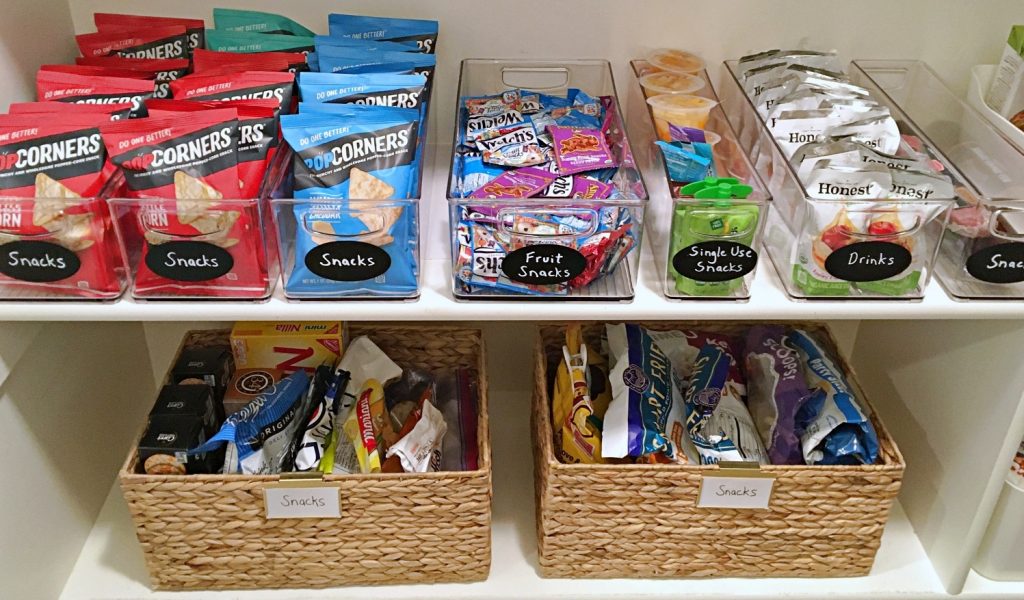
Identifying commonalities across items and grouping like things together is a key step in organizing! Often where we stumble is assigning categories that are too specific. For example, you may currently have pretzels, potato chips, and popcorn in your pantry. If these items are decanted into containers, you may have labeled them as such (pretzels, potato chips, and popcorn). But, you may not always have these things on hand. When we buy tortilla chips, we don’t have a place for them. We don’t have appropriate labels anymore, and our systems fall apart.

Instead, try more generic categories such as “snacks”. More specific categories are ok if they are representing things that you always have on hand.

3. Categories aren’t labeled

Unlabeled areas/containers become miscellaneous catchalls, because there is nothing that clearly identifies it as anything else.

Labels are sooo key. Even if a category name seems obvious to you, it may not to others in your household. I’ll write a separate blog post to dive into the best labels for different scenarios. But, for now, I’ll recommend a few:

  1. Everyday label maker: Great for labeling solid plastic containers.
  2. Chalkboard labels. Elevates the look beyond your standard label maker label. Fun to use in pantries.
  3. Bin clip labels. I love to use these! Many popular bins do not accommodate an adhesive based label due to their material (fabric, wicker, etc). So, these are handy to have on hand. They clip right onto the edge of a container. You can write onto the included paper or print your own label to adhere to it.

4. Organizing too much at a time

There’s a tendency to take an all or nothing approach to organizing. Living in a state of disorganization can weigh on us, building up stress until we finally hit the “too much” point. We feel like it’s too out of control, we can’t go another day in this state, so we make a BHAG (big, hairy audacious goal – as Jim Collins would say). That’s all well and good. But, it is too overwhelming to tackle everything at once.

Slow and steady wins the race, in this case. Choose a small area to build momentum. This could be a drawer or a shelf. No space is too small! You’ll get to it all, eventually, if you pace yourself.

5. Going solo

You know what’s in your head when you’re organizing. The system makes perfect sense to you. But, if you want it to stick, everyone in your household needs to be on board – or, at the very least, aware, of the new and improved level of organization.

family photo

Let them know you’ve found homes for everything so that it will be easier for them to find things! Or, better yet, welcome their input and assistance. Discuss the other expected benefits. Walk them through where things belong, and how everyone can play a role in maintaining the space. Then, prepare to exercise loads of patience as everyone adjusts!

6. Overcomplicating the process

When we unnecessarily overcomplicate organizing, it becomes more of a burden than a blessing. And, when something is a burden (time consuming, hard to remember, not intuitive) it will be difficult to maintain.

There is beauty in simplicity. When something is simple, we can involve even young kids. For example, a simple calendar where each family member’s entries are a particular color can be understood and maintained by everyone. But, if there are different codes and colors for each type of entry (school, sport, activity, appointment, etc) and for each family member, it can quickly become complicated and can contribute to visual clutter. Keep it simple!

7. Not committing to change

There’s a human behavior component to organizing that is sometimes overlooked. The physical space is one element and the new habits to support the maintenance of that space is another. Buckle down those first couple weeks as you commit to maintaining what you’ve set up. The good news is that small changes go a long way.

For example, if clutter was the issue, commit to putting things away where they belong before moving on to something else. This is especially helpful with kids and their toys.

Of course, you flex along the way. This is key! You’ll adjust as you move forward. But, remember, we have to actually do something different if we want to experience different results.

8. Not personalizing it

For organizing to be effective, consider your tastes, preferences, and lifestyle. If you’re a visual person and love color coding, a visual wall chart may work great, whereas a written to do list may not. If you take your shoes off as you walk into the house, create shoe storage there, instead of/in addition to other locations.

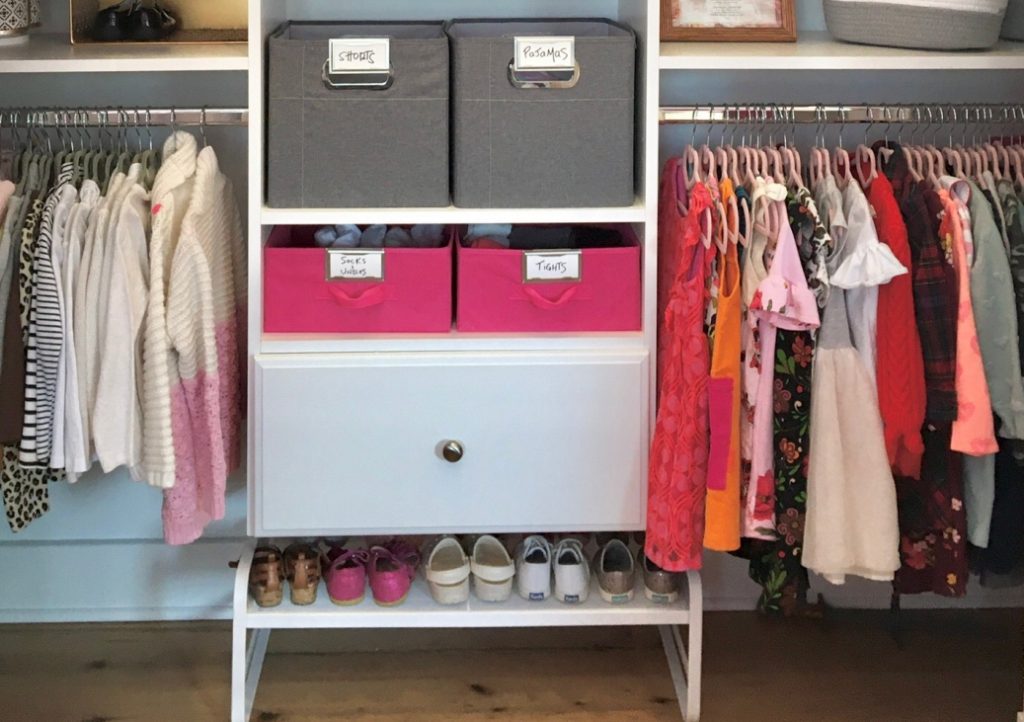
Also, consider the age and size of your kids when organizing their clothes. Put books within reach and try to use a lower hanging rod for clothes when possible. This promotes self sufficiency and less dependency on mom and dad!

kid closet

Luckily, organizing pitfalls do not have dire consequences if you fall into them! We’ll learn and course correct.

The good news is that organizing at its core is simple. Pare down to what you use, like, and have space for. Group like items together. Contain them. Label them. And put things away where they belong. Come back to this if it feels complicated. And, now that you know what pitfalls to avoid, you’re well on your way to an organized space.