*Disclosure: The amazon links included in this post are affiliate links. This means that, at no additional cost to you, I will earn a small commission if you click through and make a purchase.
An organized pantry is one of the top requests from clients. And, it’s no wonder, as it’s used daily by multiple members in your household. It has the ability to make you motivated and inspired to prepare great food, to start your day out with a feeling of calm OR the complete opposite. A cluttered pantry can make meal prep feel chaotic, can be a cause of overspending (because we can’t see what we have!) and can cause us stress. No one needs that! Let’s take our pantries back, friends! Check out these 7 steps to an organized pantry.
1. Determine your pantry’s purpose.
Seems obvious, right? Store food? Sure. But, perhaps your pantry serves as a multi-purpose space for keeping food AND cleaning supplies, overstock, pet food, appliance storage, etc. If you have enough space, it’s intentional, and it works for you, that’s great! But, if your pantry has become a dumping ground for everything but the kitchen sink, it’s time to get clear on what your pantry’s purpose is and what it is not. Go ahead and find a new home for anything that doesn’t fit within your pantry’s purpose.
2. Empty out your pantry.
I promise it’ll be worth the time it takes to do this. You’ll find expired items, duplicates, and things that belong somewhere else (you remembered that “purpose” step above, right?) Get rid of anything that is expired, broken, or that you no longer need.
3. Decide on pantry zones.
These will likely correspond to what containers you will use and how you will allocate your space. Do you need a baking zone? A snack category? Other common ones include pasta or grains, drinks, eat first, treats, or dinners. Once you’ve identified these zones/categories, you’ll be ready for step 4.
4. Containerize.
Containerizing serves a helpful purpose in defining the space we’re allocating toward a certain item or category. Without these boundaries, it’s easy to overstuff a shelf, making it hard to see what you have. It works well to decant your dry goods/baking goods into containers such as *these OXO containers (my absolute favorite). The link is for a large size great for flour or sugar. There are lots of other sizes as well.
Containers make items visible and help you to see when items are running low. Have fun with this step! What is your personal style? Do you prefer the homey warmth of baskets, the utility of a great acrylic bin? Are you looking to utilize what you already own? Fantastic!
Container resources: The Container Store, Amazon, Target, Home Goods, and Bed Bath and Beyond are all great for containers.
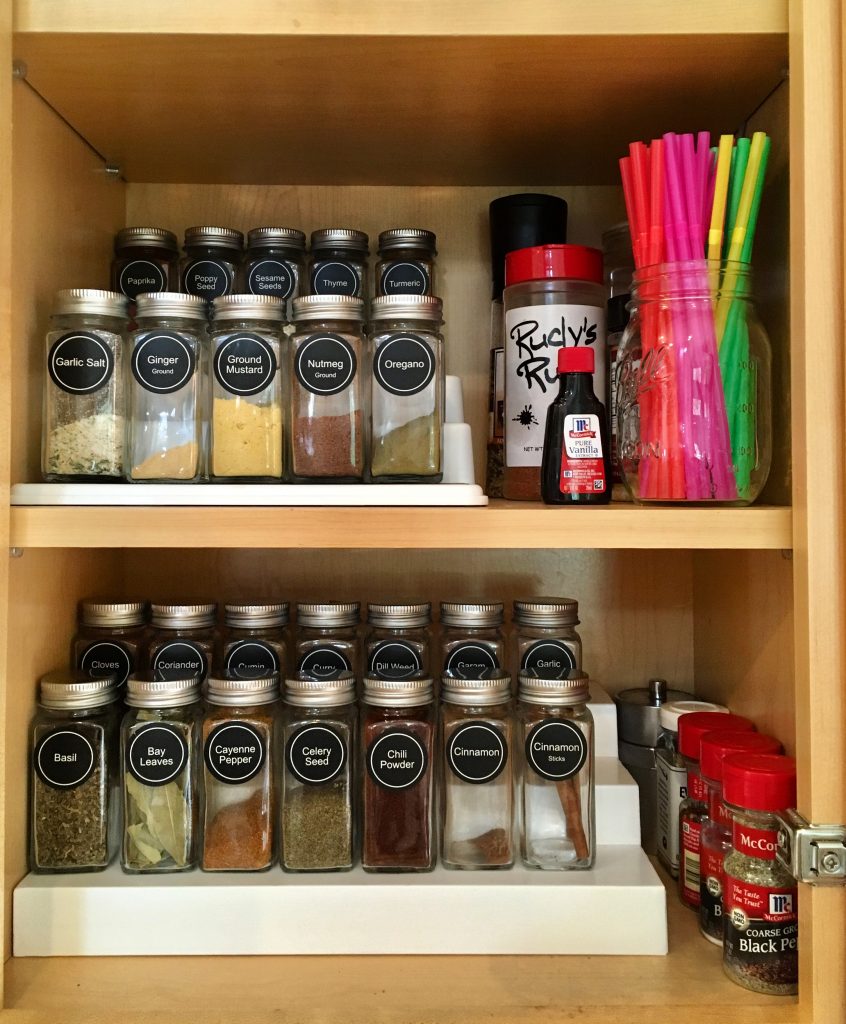
5. Label.
Particularly if you have several different kinds and styles of containers in your pantry, the simple addition of utilizing consistent labels will bring a cohesive look to your space. Labels can be functional and fun! You can use a label maker (*here’s a good one), purchase inexpensive *chalkboard labels, or make your own! Labels are easy to change out down the road if you have a new category or if something isn’t working for you. Tip: It works well to keep your label category names generic. Unless you always have Fritos on hand, for example, it’s best to use the label of snacks. This affords you maximum flexibility and increases the likelihood that you’ll have a category just perfect for that new product you’re waiting to try.
6. Utilize all the spaces.
An organized pantry is one where all the space you have is maximized. If you have a pantry with a door, consider how to use the back of the door for additional storage. Or you can add hooks to walls to hang up aprons or dish towels. I’m a fan of putting large bins on the pantry floor for overstock or to house those bulk Costco purchases.
Lazy Susans are helpful for oils and vinegars or any round items. *Here is a great one. Or *this divided one. Even if your pantry consists of just a small cupboard, consider how to maximize it by adding risers or command hooks throughout.
7. Maintain.
Once you have your categories, containers, and labels, the space largely maintains itself. Really! If you find a category that’s overflowing (ours is snacks!), readjust your space and your containerizing to accommodate your real life. Or, you could purchase fewer snacks…nah! Ensure everyone in the household is prepped on where things get put away in your new and improved organized pantry and get on with the more exciting things in your life!